Canning
101
Why Can?
1) Lost
art
2) Saves
money on groceries
3) Makes
great homemade gifts
4) Emergency
back-up food (from “oops, I forgot to buy spaghetti sauce!” to grid-down)
5) Food
knowledge empowerment (I know what is in the jar because I made it)
The Science
1) Super
heating to kill bacteria, leaving preserved produce inside
2) Vacuum
concept (air pressure outside jar is different than inside, forcing lid to
seal)
3) Holds
in vitamins and minerals
Terminology
Blanch- pour produce into already boiling water, then
remove after short, prescribed period of time (usually 2-5min), then quickly
put under cold water to halt cooking process.
Most commonly used for freezing produce.
Head Space- the measurement between the top of the
produce and the top of the jar where the lid will sit
Botulism Poisoning- a serious illness contracted from
improperly prepared food. In the case of canning, a jar that became unsealed
and rotted the produce.
Basic Water Bath Canning

Materials Needed:
-water bath canner and it’s jar rack
-recipe
-good quality, ripe produce
-accessories needed (food processor, cutting board,
knives, etc)
-glass jars (make sure there are no nicks, cracks, or
chips in glass)
-appropriate lids and rings (some jars are wide-mouthed)
-canner accessories (jar funnel, magnetic wand for retrieving
lids, head space ruler, etc)
1) Read
entire recipe through!
2) Plan
on a full day, esp if you have children. Involve the help of your children!
They will feel so important!
3) Sterilize
jars (I use the canner itself with hot water and set the jars in upside down,
but running the dishwasher without soap works great, too!)
4) Working
with a friend helps!
5) Work
in shifts (like during applesauce, be saucing the next batch while the first is
in the canner)
6) The
kitchen timer is your best friend, ESP if you have children!
7) Let
canned jars sit undisturbed overnight to ensure seal
8) Check
seals the next day, and put any unsealed ones in the fridge and use within a
week
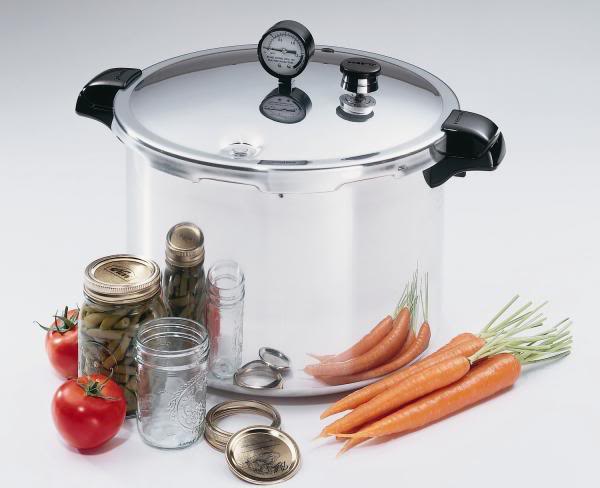 Basic Pressure Canning
1) The
only item different you will need from water bath canning is a PRESSURE CANNER
(not pressure COOKER)
2) Be
sure to use good-quality glass jars that have a name brand on them like Ball,
Knerr, or Atlas
3) YOU
CAN DO THIS! Don’t let the horror
stories scare you.
4) Read
the entirety of your pressure canner’s instructions thoroughly.
5) Ask
an experienced friend over
6) Try
to make the actual canning part during naptime
7) USE
THE KITCHEN TIMER
8) Do
NOT leave the canner unattended while there are jars inside. The pressure must be carefully monitored
during canning.
9) Let
canned jars sit undisturbed overnight to ensure seal
10)
Check seals the next day, and put any unsealed
ones in the fridge and use within a week
Oven Canning and Dehydrating
You can easily create your own dried culinary herbs and
even can dry goods using this oven method!
To dehydrate basic fresh herbs (parsley, cilantro, basil,
etc):
1) Preheat
oven to 250 degrees
2) Choose
ripe, good-quality produce and cut off/discard any browning or rotting pieces.
Wash.
3) Cut or
chop to desired size
4) Spread
evenly on a cookie sheet
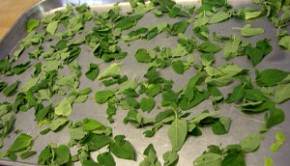 5) Bake
in oven a few hours, or until crispy and no moisture is left (check every half
hour or so)
5) Bake
in oven a few hours, or until crispy and no moisture is left (check every half
hour or so)
6) GREAT
way to help heat the house in the winter, and this is also best done in the
winter because of summer humidity
To oven can dry goods (pasta, flour, oatmeal, cake mix, cookie
mix, hot cocoa gift jars, etc):
1) Oven-canned
dry goods can last up to 30 years!
2) Main
purpose of oven canning is to rodent-proof dry goods you don’t use often, or to
increase your emergency stash.
3) Best
value for your work is to can in half-gallon glass jars
4) Put
dry goods in clean, sterilized, dry jars
5) Screw
on tightly appropriate lids and rings
6) Place
jars in a roasting pan, casserole dish, or cookie sheet for easy transport and
place in oven
7) Heat
oven to 200-250 degrees
8) Set
timer to 1 hour
9) After
1 hour’s time, bring jars out of oven and let cool on a counter or table. Enjoy the ‘ping’ of them all sealing! Check seals before storage.

Canning Tips
1) THE
MOST COMMON CANNING MISTAKE IS PUTTING A COLD JAR INTO HOT WATER (the jar will
break, shooting produce all over your other jars in the canner and ruining the
water)
2) A
splash of vinegar in the canning water will help jars come out of the canner
without the white film from our softened water.
3) When
opening some canned produce to use, SMELL IT FIRST. If you suspect anything is wrong, chuck it.
4) Old mayonnaise
lids work GREAT for storing an opened, but not finished, jar of produce
5) Put
a free classified ad in the local paper asking for canning jars or canning
supplies. Let them know you will pick
up, and that will help ensure you get them for free. “Work the system” by
saying you’re a young mother interested in this lost art. Works every time ;P
6) Periodically
take a peek in the OC glass recycling by Alco.
It’s amazing how many high-quality canning jars are just thrown
away! Before you take them home, check
the rim to make sure there are no nicks or cracks, as that’s probably why they
ended up in the recycling.
7) Old
glass mayo and applesauce containers work for water bath canning! I reserve these lesser-quality jars for my
juices.
8) To
get skin off tomatoes, peaches, and plums see definition of “blanch” above.
9) Facebook me. Email me. Comment here. Stop over! I am
serious! I want to help make this work
for you!
No comments:
Post a Comment
Feel free to comment and/or question! I will get back to you as soon as I can! :-)