Friday, February 21, 2014

Mommy's Command Center

My mother is an insanely organized person.  Somehow, luckily, she passed on to me a TINY bit of those skills, and today I'd like to share with you how to make a Mommy's Command Center.  Last night I even went so far as to host a party for friends of mine who are also young mothers, and we made these binders.  The total cost for this project was only $10!

Before we begin, please not that this is YOUR binder to help keep your life as a wife/mother more organized.  That being said, you may (and should!) tweak this project to fit YOU.   

Materials Needed:
- 1 three-ringed binder, preferably with the clear plastic pouches in the front/back (for personalizing later)
- 25-pack of plastic sheet covers (or more, if you're crazy-addicted to them as I am)
- Notebook paper
- 2-pocket insertable plastic dividers  (Follow link to see what they look like.  These are great because they are color-coordinated, have pockets, but most importantly they stick out beyond the regular papers that will be in your binder for easy access to each section.  There are 5-tab folders and 8-tab.  I went ahead and got myself the 8-tabbed one because I would rather diversify than not have enough tabs to meet my needs.)
- Treat yourself to a nice pen. Mine is Batman ;P 
 
- EXPO marker (I have found this brand does not rub off the plastic sheet covers) 
- double-sided tape or glue
- construction paper, opt
- ruler
- scissors
- Personalizing Part: fun pictures from magazines or old calendars to make your front and back covers. Pictures of your family are great to put on there, too!
**The total cost for the binder, pack of 25 plastic sheet covers, the 2-pocket insertable folders, a new pen, and an EXPO marker was right at $10**

Step 1: Create your tabs
This part is the most challenging piece of this project, and many women struggle to find just the right topics for each tab.  Mine is separated as follows:
GENERAL- holds the daily/weekly/monthly schedules, as well as random important info that doesn't fit in the other categories
FOOD- meal plan, store ads, coupons, recipes, etc
HOUSE- cleaning schedule, chores, projects needing done, etc
BILLS-  self explanatory, sadly ;P
NEWFIE BUSINESS- my home business is breeding Newfoundland dogs, so I have a section dedicated to this with all of her certifications and pedigree information, along with vet records.
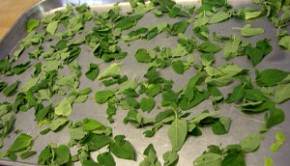
GARDENING/CANNING- garden plans/sketch, list of veggies, notes on each, as well as canning recipes I come across.
FOLDER PER CHILD- Especially if they are in school, and DEFINITELY if they are homeschooled.  This can be used to keep their school activities and announcements separate, or for the homeschooled child it could be a nice way to keep track of their learning/assessment items.  For now with our almost-2 year old, I keep printed worksheets I find online or lists of books we want to get from the library, as well as an on-going wish list for birthdays and Christmas.

While those are MY tabs, just remember to make the tabs according to YOUR family.  For example, if you aren't the one to open the mail or do the bills, a BILL section probably isn't for you.  The same goes for if you aren't the main shopper/cook.  However, if you live on a farm, it might be productive for you to have an animals section, especially if your children show the animals in 4-H.  Speaking of children's activities, if you happen to be in charge of or a leader of a group, I would also make a section for that.

Step 2: Personalize!
The front of my Command Center
Examples of some fronts of binders
This is the fun part!  Take time to create your own beautiful collage or design for the front and back (and even a slab for the side tab!) of your binder.  Again, I grab a few of the free calendars from Hallmark in the fall to use for making these Command Centers as gifts throughout the year.  Magazines, online printing, and even family photos also make great choices!  GET CREATIVE! :-)
Examples of some backs. I try to find pictures of the same number of children as the person receiving the binder has.


Step 3: Add and Sort
For this last step, you again have to find what works for YOU.  It's time to find (or make, if you're that creative) your own style of scheduling and print them off and place in the appropriate folders.  Over time, I have found via various blogs I follow different daily schedule forms or household project ideas I like and have added them to my binder.  Some of the items I have in my Command Center can be found via Wellnessmama.com's blog. Katie "Wellnessmama" is my favorite blog to read, and her "football" is actually where I got the original idea to put my family's life into one, organized binder.  However, a simple google trip can find you schedules galore (especially if you go to the "images" section after your google search), as well as Christian character-shaping chore charts for children, children's prayer sheets, worksheets for home and church, entire deep-cleaning household chore lists, and of course recipes!

Don't forget to include your favorite pen and an EXPO marker.  The marker works great for marking on the schedules VIA the plastic sheet covers the schedule is kept in.  That way, you aren't printing off a new schedule every day/week/month to use, and that way you can save on some paper and ink!

In closing, I would argue that organization is next to cleanliness, which we all know is next to godliness. :-)  It will do your mood and spirit well to sift through the clutter we all feel as wives and mothers and take a few moments to put them in a designated place where they belong.  Happy Healthing! :-)


Tuesday, February 18, 2014

An Herbal Home Pharmacy

Many of you have asked, "Maggie, could you make me a list of what you have in your cupboards and diaper bag?" 

Sure!  This is a great idea, and I have been meaning to find the time to make this post.  Before I begin the list, please note that my husband and I are on a tight budget, so the companies listed may or may not be the best and most effective out there.  Most were a company's sale items to get me as close as possible to the best, and if that is the case, I put in parenthesis what I would have LIKED to have bought instead.  Also, instead of going through the trouble of taking and posting a ton of pictures here, the items can be clicked on to find their picture and company website online. :)  Please don't be afraid to ask questions or leave comments!  I have had many of you facebook or email me with some GREAT questions, and I feel honored to be a part of your exploration into the natural living world! Happy Healthing! 

In my kitchen "herb" cabinet:
coconut oil (mind is refined, which is used mostly for cooking, whereas unrefined would be best for health uses)
- prenatal taken daily BEFORE pregnancy
- prenatal taken DURING pregnancy (I think this product is better so I save it for when I am actually pregnant)
calcium citrate plus D (calcium carbonate is a "lesser" form of calcium)
- activated charcoal
- liquid elderberry extract
- liquid echinacea
- chewable Chamomile tablets (for both teething and labor pains as it helps you relax safely)
- Tea Tree oil (make sure it says it was made in Australia as the American version uses a different distilling process that alters the product)
- Lavender essential oil (used mostly for fragrance in lotions, soaps, etc)
- Motherwort tincture (the tincture I had was made at home, but the link is for information about motherwort and its benefits in the world of motherhood)
-Lobelia tincture
-Fenugreek capsules (nursing productivity)
-L-Lysine (immune function)
- 2lb. block beeswax for making salves, lotions, lip chap, etc
bentonite clay (used in our remineralizing tooth powder recipe from Wellnessmama.com) 

In my Tea cabinet:
- rose hips
Chamomile tea (this is just the type from the local grocery store, but has worked great so far)
red raspberry leaf tea (since purchasing this, I have found how to harvest my own leaves from our raspberry plants each spring)  
- nursing support tea (can be found at Target)
- homegrown catnip 
-basic black tea (used for making a warm eye soak for pink eye)


On my wish list:
These are items I will either be growing, exploring, and harvesting this year OR items I will be purchasing soon with my husband's hard-earned money. :)
Chamomile (Roman) essential oil (scroll down. Note how expensive 1/8 oz is, but it's a very powerful and useful item.  Just a few drops carries heavy weight for many natural remedy recipes.  I am also growing this item this season, but will not have near the quantity or equipment to harvest any essential oil.  I will be keeping the flowers for tea.)
- spearmint
- peppermint
- catnip
- calendula
- lemon balm

Pills I 'Pop' Daily:
- 1 of the BEFORE pregnancy prenatal
- 2 calcium-magnesium 
- 4 NFX (fertility support)
- 1 generic folic acid
- 2 prolamine iodine (thyroid support)
- 1 B-12 vitamin
**I also try to drink a few cups of iced red raspberry leaf tea with my calcium water mixed in. Don't forget the honey! :-)** 

Great General Items to Keep on Hand:
- fresh garlic
- white vinegar
- apple cider vinegar
- baking soda  
- otoscope (GREAT item to put on your birthday list!)
- stethoscope and blood pressure cuff set (I haven't used mine yet, but am ready if I need to!)  
 

Thursday, February 13, 2014

Calcium-Infused Water

What a great, easy way to get calcium!  This recipe was found in Shosanna Easling's book, Making Babies.  However, I took her quart-jar method and tweaked it a little to fit the busy mom's schedule. ;P  PLEASE NOTE that farm-fresh eggs are the best way to go, especially chickens that are on non-GMO feed, as my family has been so blessed to enjoy from nearby friends. :)

Step 1: Rinse and save 8 eggshells.
Keep in the fridge :)


                                                    Step 2: Hulk. Smash!


Step 3: Using a coffee maker, fill reservoir with 4 cups of water.  Pour crushed eggshells into coffee filter, as you would grounds.  Press start!  When finished, I add my calcium water to a big batch of herbal iced tea that I will drink during the week, and compost the eggshells. If this method is not convenient for you, you may also boil the 4 cups of water in a pan, dump in the shells, let sit until cool, and sift out the eggshells after.  Happy Healthing!  :-)


Monday, February 3, 2014

Canning 101


Canning 101
Why Can?
1)   Lost art
2)   Saves money on groceries
3)   Makes great homemade gifts
4)   Emergency back-up food (from “oops, I forgot to buy spaghetti sauce!” to grid-down)
5)   Food knowledge empowerment (I know what is in the jar because I made it)
The Science
1)   Super heating to kill bacteria, leaving preserved produce inside
2)   Vacuum concept (air pressure outside jar is different than inside, forcing lid to seal)
3)   Holds in vitamins and minerals
Terminology
Blanch- pour produce into already boiling water, then remove after short, prescribed period of time (usually 2-5min), then quickly put under cold water to halt cooking process.  Most commonly used for freezing produce.
Head Space- the measurement between the top of the produce and the top of the jar where the lid will sit
Botulism Poisoning- a serious illness contracted from improperly prepared food. In the case of canning, a jar that became unsealed and rotted the produce.

Basic Water Bath Canning
Materials Needed:
-water bath canner and it’s jar rack
-recipe
-good quality, ripe produce
-accessories needed (food processor, cutting board, knives, etc)
-glass jars (make sure there are no nicks, cracks, or chips in glass)
-appropriate lids and rings (some jars are wide-mouthed)
-canner accessories (jar funnel, magnetic wand for retrieving lids, head space ruler, etc)

1)   Read entire recipe through!
2)   Plan on a full day, esp if you have children. Involve the help of your children! They will feel so important!
3)   Sterilize jars (I use the canner itself with hot water and set the jars in upside down, but running the dishwasher without soap works great, too!)
4)   Working with a friend helps!
5)   Work in shifts (like during applesauce, be saucing the next batch while the first is in the canner)
6)   The kitchen timer is your best friend, ESP if you have children!
7)   Let canned jars sit undisturbed overnight to ensure seal
8)   Check seals the next day, and put any unsealed ones in the fridge and use within a week

Basic Pressure Canning
1)   The only item different you will need from water bath canning is a PRESSURE CANNER (not pressure COOKER)
2)   Be sure to use good-quality glass jars that have a name brand on them like Ball, Knerr, or Atlas
3)   YOU CAN DO THIS!  Don’t let the horror stories scare you.
4)   Read the entirety of your pressure canner’s instructions thoroughly.
5)   Ask an experienced friend over
6)   Try to make the actual canning part during naptime
7)   USE THE KITCHEN TIMER
8)   Do NOT leave the canner unattended while there are jars inside.  The pressure must be carefully monitored during canning.
9)   Let canned jars sit undisturbed overnight to ensure seal
10)   Check seals the next day, and put any unsealed ones in the fridge and use within a week


Oven Canning and Dehydrating
You can easily create your own dried culinary herbs and even can dry goods using this oven method!
To dehydrate basic fresh herbs (parsley, cilantro, basil, etc):
1)   Preheat oven to 250 degrees
2)   Choose ripe, good-quality produce and cut off/discard any browning or rotting pieces. Wash.
3)   Cut or chop to desired size
4)   Spread evenly on a cookie sheet
5)   Bake in oven a few hours, or until crispy and no moisture is left (check every half hour or so)
6)   GREAT way to help heat the house in the winter, and this is also best done in the winter because of summer humidity
To oven can dry goods (pasta, flour, oatmeal, cake mix, cookie mix, hot cocoa gift jars, etc):
1)   Oven-canned dry goods can last up to 30 years!
2)   Main purpose of oven canning is to rodent-proof dry goods you don’t use often, or to increase your emergency stash.
3)   Best value for your work is to can in half-gallon glass jars
4)   Put dry goods in clean, sterilized, dry jars
5)   Screw on tightly appropriate lids and rings
6)   Place jars in a roasting pan, casserole dish, or cookie sheet for easy transport and place in oven
7)   Heat oven to 200-250 degrees
8)   Set timer to 1 hour
9)   After 1 hour’s time, bring jars out of oven and let cool on a counter or table.  Enjoy the ‘ping’ of them all sealing!  Check seals before storage.


Canning Tips
1)   THE MOST COMMON CANNING MISTAKE IS PUTTING A COLD JAR INTO HOT WATER (the jar will break, shooting produce all over your other jars in the canner and ruining the water)
2)   A splash of vinegar in the canning water will help jars come out of the canner without the white film from our softened water.
3)   When opening some canned produce to use, SMELL IT FIRST.  If you suspect anything is wrong, chuck it.
4)   Old mayonnaise lids work GREAT for storing an opened, but not finished, jar of produce
5)   Put a free classified ad in the local paper asking for canning jars or canning supplies.  Let them know you will pick up, and that will help ensure you get them for free. “Work the system” by saying you’re a young mother interested in this lost art. Works every time ;P
6)   Periodically take a peek in the OC glass recycling by Alco.  It’s amazing how many high-quality canning jars are just thrown away!  Before you take them home, check the rim to make sure there are no nicks or cracks, as that’s probably why they ended up in the recycling.
7)   Old glass mayo and applesauce containers work for water bath canning!  I reserve these lesser-quality jars for my juices.
8)   To get skin off tomatoes, peaches, and plums see definition of “blanch” above.
9)   Facebook me. Email me. Comment here. Stop over!  I am serious!  I want to help make this work for you!